Some times may arise when you have got Bootloop situation with your Redmi Note 3 device and you don't know what to do. Of course you can flash stock ROM via MiFlash tool and get this fixed. But when even your MiFlash tool isn't properly set up and you don't know what to do, this ROM comes to rescue.
One of my Dolanite friend Chiranjit Singh, told me about this ROM. It helped me when I got boot loop once and also MiFlash wasn't working. So Now I'm sharing this with you.
This Factory ROM for Redmi Note 3, Android Open Source Project (AOSP) ROM which is of Android Marshmallow version can be flashed via Fastboot. You just need to Boot your device into Fastboot mode and run a batch file to flash this ROM.
Note:
Requirements:
One of my Dolanite friend Chiranjit Singh, told me about this ROM. It helped me when I got boot loop once and also MiFlash wasn't working. So Now I'm sharing this with you.
This Factory ROM for Redmi Note 3, Android Open Source Project (AOSP) ROM which is of Android Marshmallow version can be flashed via Fastboot. You just need to Boot your device into Fastboot mode and run a batch file to flash this ROM.
Note:
- After flashing this ROM, sometimes IMEI number may get erased. Restoring IMEI is explained in the later part of this post.
- I'm Not responsible for results achieved after wrong following of the below said procedure.
- Files in the Internal storage will be deleted.
Requirements:
- A Redmi Note 3 Snapdragon variant. (Mediatek variant doesn't work with this ROM)
- The ROM file - Download here.
- You will need to have a device with unlocked bootloader (for fastboot flashing permissions).
- A USB cable to connect the phone.
- Make sure all necessary device drivers are installed properly (read 'this article' to setup Fastboot/ADB drivers if you face any problem)..
- Probably some 15 minutes of your time.
Procedure:
Step 1: Procedure is highly simple. Enter the Fastboot mode in your Kenzo. This can be done by pressing and holding 'Volume Down+Power button' for a while. A bunny must appear with a Fastboot title.
Step 2: Now Connect the phone to the computer using USB cable.
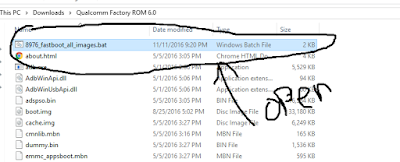
Step 3: Open the extracted ROM folder and find for a file '8976_fastboot_all_images.bat' and execute it.
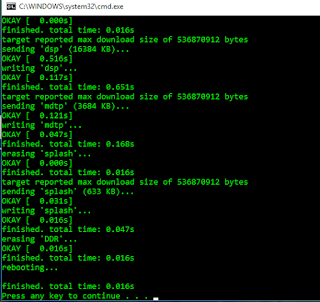
Step 4: Wait for some flashing to take place.
Restoring IMEI (If got erased):
Step 5: After flashing is complete, ROM should boot automatically. In some devices, there is a possibility of IMEI getting erased as a result of which, you may not be able to use mobile networks in the device. Let's look at how to fix it.
Step 5: After flashing is complete, ROM should boot automatically. In some devices, there is a possibility of IMEI getting erased as a result of which, you may not be able to use mobile networks in the device. Let's look at how to fix it.
Step 6: Enable Developer options in your phone.
Enabling USB debugging:
Step 6.1: Go to 'Settings > About phone '. Tap on 'Build Version' multiple times until you read a message of Developer options getting enabled. (Also check the 'Enable OEM unlocking' just in case something happens)
Step 6.2: Now Enable USB debugging. Go to 'Settings > Developer options'. Tick the USB debugging option.
Step 7: Now comes the IMEI writing part to be able to use mobile networks.
Just read this article -> 'How to restore IMEI of Redmi note 3 kenzo'.
Step 8: Now You have atleast this ROM for working Out.


Share your views about this article!